
Vegan Vanilla Cake
July 8, 2021
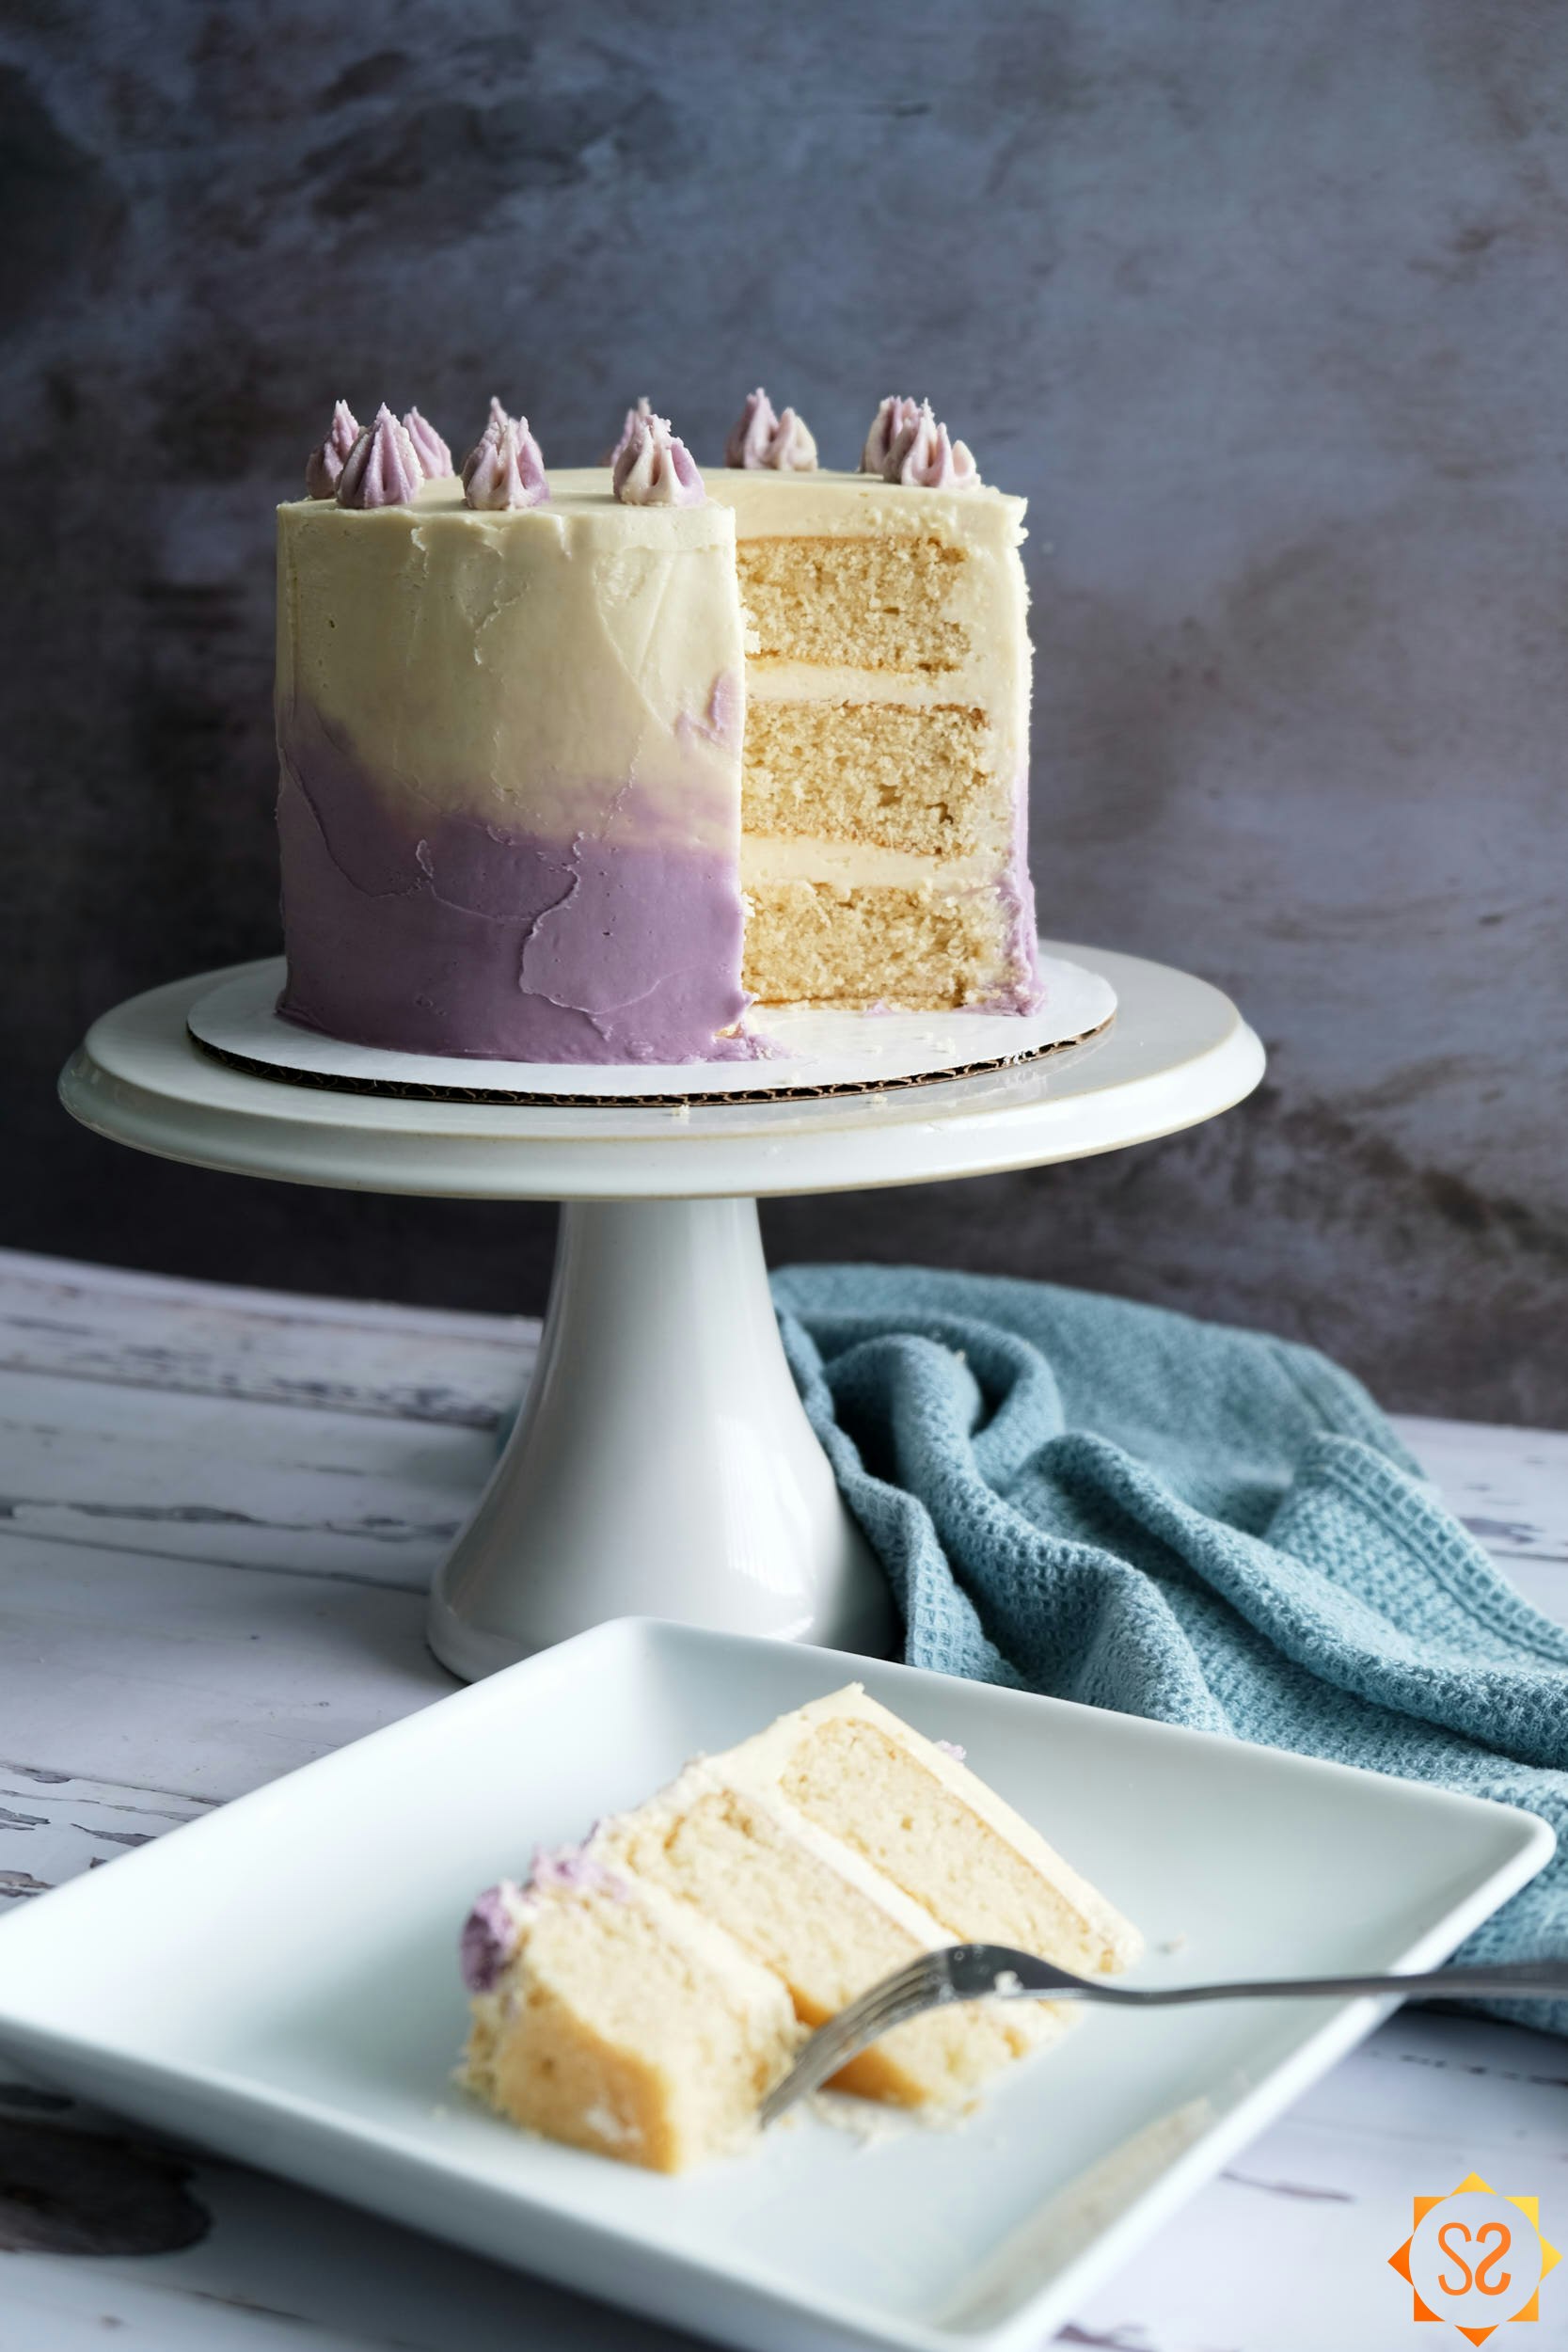
I might be known as "the cupcake lady" in certain circles, but I like to make a delicious full-sized cake just as much as the next lady. This classic vanilla cake is another recipe that I veganized from one of my previous business's famous recipes. It's light and fluffy, but also rich-tasting, thanks to the vegan butter in this recipe. The vanilla flavor is paired with a moist, tender crumb for an absolutely delicious vegan vanilla cake.
It may be a few minutes of extra work compared to some other vegan cake recipes, but I think you'll find that the additional steps are worth it in the result!
This white cake is perfect for birthday parties, because everyone will love it, and no one will know it's vegan unless you tell them. This cake even tastes great on its own without frosting (but I still use frosting anyway).
This recipe makes enough batter for three 6-inch round layers. To make sure your layers are even, I recommend using a food scale to weigh each layer before baking them. You can also use a measuring cup if you don't have a food scale.
I typically pair this recipe with 2 batches of my vegan buttercream frosting. You can reduce it to 1 or 1 1/2 batches for a naked cake. If you want to make colored frosting, add the food coloring before adding the non-dairy milk. Then, add the non-dairy milk if you still need it to get the right texture. You can also use gel food coloring without altering the non-dairy milk, but it's a little harder to find vegan gel food coloring, while I can get regular vegan food coloring at my local supermarket (Whole Foods carries it).
Can I convert this recipe to another size cake?
I have not tested this recipe in other sized pans, so these are approximate conversions. Please be aware that baking times may vary when changing the pan size.
two 8-inch round layers: Same amount of batter
three 8-inch round layers: 1.5x
two 9-inch round layers: 1.5x
three 9-inch round layers: 2x
Making a beautiful layer cake
Many cake experts recommend getting flat layers by slicing off the domed top. They suggest removing the caramelization on the edges by chipping away at it with a serrated knife. I personally think that's too much work, especially when there's an easier solution: cake strips.
Cake strips are pieces of fabric that you can soak in water, then wrap around the edges of the cake pan. The water keeps the edges from heating up faster than the rest of the cake, giving you a flat top and light, fluffy edges. If you don't want to buy cake strips, you can also make your own with paper towels and aluminum foil. Preppy Kitchen has a great video detailing the process for this. Some people also cut strips from old bath towels and attach them with safety pins.
I did test this recipe without cake strips, and it didn't produce a domed top. However, the edges did come out very caramelized and the cake was a little dense (see photo in the next section). The cakes baked with cake strips were lighter and fluffier in texture overall.
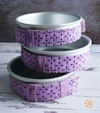
The right pan is also essential for getting the best result. First, you should avoid dark non-stick pans. Bright aluminum pans work best. Also, make sure that the sides of your pan are straight and not sloped. I used these 6x2-inch Wilton cake pans.
Getting your cakes out in one piece
I tested three methods of preparing the pans: the classic (vegan) butter & flour method; a parchment paper circle at the bottom; and a mix of shortening, oil, and flour. The last method comes from Haley at If You Give a Blonde a Kitchen, and it worked best in my tests. For that method, I mixed 1 1/2 tablespoons each of vegetable shortening, sunflower oil, and all-purpose flour, then brushed it on the pans. The parchment paper circle also worked well, but the cake itself baked just a little less evenly. The butter and flour method tore my cakes apart (zero stars, don't recommend).

Decorating
To get a beautiful looking cake, you will need some basic decorating tools: a decorating turntable, grease-proof cake boards (if you want to move your cake from the turntable), an icing smoother, a flat icing spatula, piping (pastry) bags, and large piping tips (bags and tips optional). I also use some non-slip shelf liner to make sure my cake board doesn't slide around on my stand.
For easier frosting, I recommend freezing your layers overnight. Then, you can take them out when you start making the buttercream, so they're just slightly thawed when you're ready to start frosting.
Begin by putting a cake board on your turntable (with some shelf liner in between to avoid slipping). Spread a little bit of frosting in the middle of the cake board so your cake won't slide around.
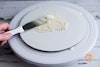
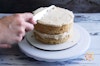
Place the first layer on the cake board carefully, as close to the center as you can. You can then either pipe or scoop and spread frosting onto the layer. Use your flat frosting spatula to spread the frosting evenly. I usually put about 3/8" to 1/2" (1 cm) of frosting between each layer.
Place the second layer on top and press down just a little to make sure there's no air trapped between the layers. Then repeat the process until all your layers are assembled. Make sure your layers are straight before frosting the top and sides. You can line up your icing smoother along the side of the cake to see if it's straight, and adjust the layers if needed.
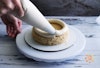
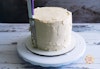
For the top and sides of the cake, you'll want to start with a thin layer of frosting. Apply the frosting with a flat spatula, then use the icing smoother to make sure it's even and thin. This layer will be a foundation for the rest of your frosting, and it will also trap any crumbs so they don't get into the rest of the frosting. Put the whole cake into the freezer for about 5 minutes, or until the frosting has hardened up.
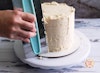
Then, you can apply your final layer of frosting. Pipe or pile the frosting on with the spatula, then spread it around to get a thick coating using the spatula. Use your icing smoother to get the icing completely smooth. Apply light pressure to the sides as you spin the cake. You can then smooth the top of the cake by pulling out towards the edges from the center.
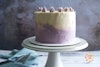
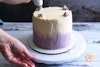
For an ombre effect as shown in the photos, start when you're making the buttercream: separate out about 1/2 cup of the buttercream before adding the non-dairy milk to it. Then, add vegan food coloring of your choice, and add non-dairy milk if it's needed to get the right texture. After you've frosted the cake as usual with the white frosting, pipe or scoop dollops of colored frosting around the base of the cake. Then use the icing smoother to pull the frosting up the cake as you spin it. Keep spreading and smoothing until the colored frosting blends into the white frosting and the surface is smooth.

Reserve a bit of colored frosting for piping stars on the top of the cake. I used purple and white frosting together for the stars on top of the cake.
Vegan Vanilla Cake
Yield3 6-inch layers
Prep Time25 minutes
Cook Time35 minutes
Total Time1 hour
Ingredients
- 267 g vegan granulated sugar
- 60 mL aquafaba (liquid from a can of chickpeas)
- 2 tsp. vanilla extract
- 2 tsp. white vinegar (or apple cider vinegar)
- 313 g all-purpose flour
- 1 tsp. salt
- 1 tbsp. baking powder
- 180 mL plain, unsweetened almond milk (or other non-dairy milk)
- 2 batch vegan buttercream frosting
Instructions
Preheat your oven to 350°F (180°C). Then prepare your pans by greasing them with a mixture that’s equal parts (by volume) vegetable shortening, sunflower or vegetable oil, and flour.* (I used 1 1/2 tbsp. of each to grease 3 six-inch pans.)
![three cake pans brushed with cake release grease]()
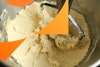
In a stand mixer using the paddle attachment, cream together your vegan butter and sugar on medium speed for about 3-4 minutes, until well-combined and fluffy. You can do this by hand, but you may need to cream the butter and sugar for a few minutes longer.
![butter and sugar creamed together in mixer]()
Add in your aquafaba, vanilla, and vinegar and mix until well-combined.
In a separate bowl, sift your flour, salt, and baking powder together. Whisk it together to make sure it’s well-mixed.
Add about 1/3 of your dry ingredients to the butter mix and mix on medium-low speed until just combined, then add about 1/3 of your almond milk. Repeat twice more until everything is just combined, but don’t overmix your batter.
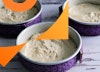
Scoop your cake batter into your pans, using an equal amount of batter for each pan. I like to weigh the pans to ensure I have even layers. If you don’t have a kitchen scale, you can use a measuring cup to measure the amount of batter you’re adding to each pan. Use the back of a spoon to spread the batter inside the pan.
![cake pans filled with batter and wrapped with wet cake strips]()
Wrap each pan with a wet cake strip, then bake for 35-40 minutes*, until a toothpick comes out clean and the cake springs back with light pressure.
Remove the layers from the pans, then let cool on a cooling rack for 30 minutes. Wrap them in plastic wrap and freeze them until you’re ready to frost them. You can also let the layers cool to room temperature and frost them, but the cake will be more delicate and difficult to frost.
Assemble the layer cake with a layer of frosting between each layer. Then frost the outside and top of the cake as desired. (Detailed frosting instructions are included in the post above).
![spreading frosting on the top layer of cake]()


Notes & Hints
Use a light-colored metal cake pan with straight sides for best results.
I recommend greasing your pans with a mixture of 1 1/2 tbsp. each of sunflower oil, shortening, and flour. See the post above for more details on this and other methods.
Cake strips help the cake to bake evenly, preventing domed tops and caramelized edges. In my tests, the cakes baked with cake strips had the best texture.
If you're not using cake strips, your cake will take about 5 minutes less to bake.
This cake will stay fresh for 3 days or so at room temperature, covered. For longer storage, I recommend freezing.
For more tips and frosting instructions, please see the post above.
Nutrition Data
Serving Size: 1/12 of recipe; Calories: 679; Fat: 32 g.; Saturated Fat: 13 g.; Cholesterol: 0 mg.; Sodium: 595 mg.; Carbohydrates: 99 g.; Fiber: 0 g.; Sugar: 81 g.; Protein: 2 g.; Vitamin A: 6 mcg. RAE; Vitamin B12: 0 mcg.; Vitamin C: 0 mg.; Vitamin D: 0 mcg.; Calcium: 63 mg.; Iron: 0 mg.; Potassium: 6 mg.; Zinc: 0 mg.Note: This data should be used only as an estimate. Please see the nutrition section of my terms and conditions for more information on how this data is calculated.


Vegan recipes in your inbox
Join the community and get my newest and best yummy vegan recipes sent right to your email!
Share this:


Leave a Comment
I love reading comments! I'll do my best to answer questions, too. If you made the recipe, please leave a star rating, it helps support the blog so I can make more recipes and articles. Thank you!
says